Growing Zinnias for Bountiful Blooms
At first, zinnias don’t seem to have the jazzy appeal of other summer favorites. They aren’t prohibitively expensive like designer dahlia tubers. They aren’t finicky like lisianthus. They don’t need to be started super early like ranunculus. At only a few bucks for a couple packets of seeds, how can they be this cool? Some things are still a good deal, and zinnias are one of them.
Zinnias are the cut flower garden workhorse you never knew you needed. Like a zucchini, zinnias will just keep on keeping on, producing more flowers without drama or fuss. They’re reliable, easy to plant and grow, and there are so many varieties and colors you could probably never grow all of them.
Every summer, the residents of a country home near me plant a strip of zinnias right down each side of their long driveway. They make a quick pass on each side with their tiller and sprinkle zinnia seeds down the new row. In a few weeks, there’s a low hedge of greenery. By midsummer, their driveway is lined with bursts of color springing forth from a three-foot-tall zinnia hedge. I don’t think they ever water, deadhead, or do anything but enjoy them when they come up the driveway. Come fall, they just mow the old stalks.
Zinnias make excellent cut flowers, too. If you’re looking for pure flower power without spending much dough and without creating a lot of work for yourself, zinnias might be the ticket.
Zinnia flower colors and shapes
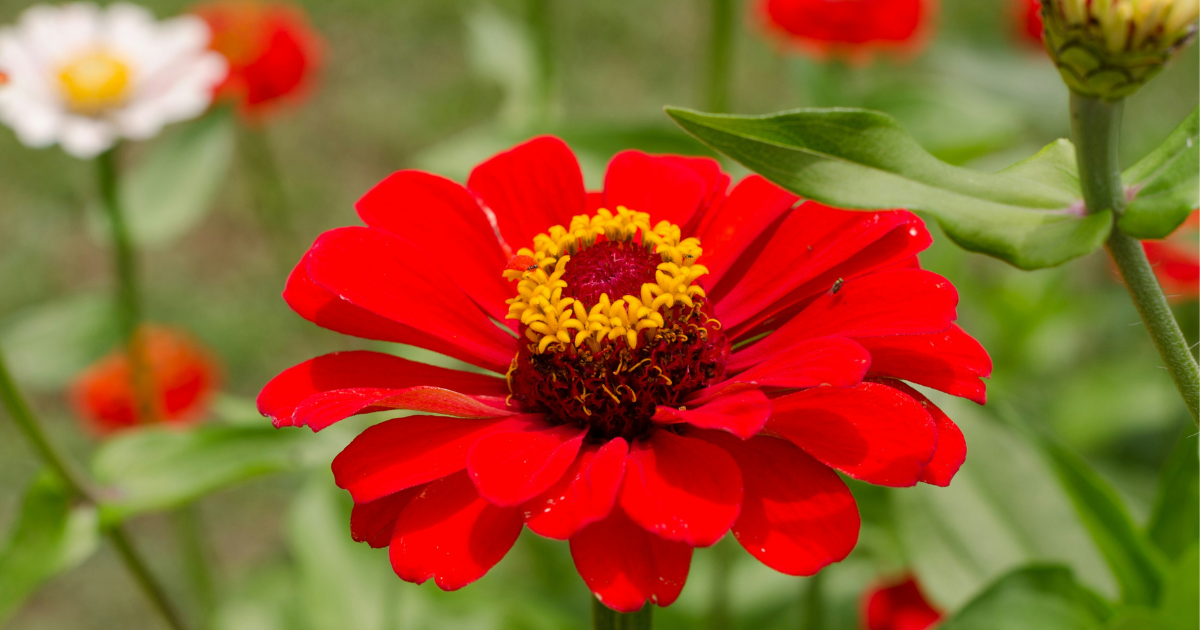
The old standard yellow, red, and orange zinnias with single blooms and gold centers are still favorites, but breeders have been creating new zinnias for us for quite some time, and the selection available now is endless. Zinnias are found in nearly every color except blue and black, with some bicolor and many multi-colored varieties. Bright colors and pastels, and even green zinnias, there’s one to match any color palette or preference.
Zinnias can have single, semi-double, or double blooms, and some, like the Swizzle Cherry and Ivory, are so round and ball-shaped that they could be mistaken for dahlias. Blooms range from compact and dainty flowers an inch across to the always stunning Benary’s Giant series, sporting blooms the size of softballs.
Tall and Dwarf Zinnias
Tall flowers are my thing, but with zinnias, you can choose from dwarf varieties perfect for lining sidewalks, planting in window boxes, or growing as a filler in containers to giants growing four feet tall. ‘Azteck Sunset’ is a low-growing variety, typically reaching only a foot tall. Many zinnias will grow about three feet tall, but several varieties will reach chest high.
Tall zinnias can be amazing in the thriller role in large planters, towering above the fillers and spillers to make a vertical flower and foliage tower. Shorter varieties are perfect for tucking into random spots in your veggie garden, inviting bees to visit, and adding a pop of color between the broccoli and tomatoes.
Growing Conditions for Zinnias
Good drainage and as much sun (full sun) as possible are the only real requirements for zinnias. They love loamy, fertile, well-drained soil, about an inch of water a week, and at least six hours of sun. Provide those things, and you’ll be buried in zinnia blooms.
However, zinnias are forgiving about all but the drainage. They won’t grow well in continuously saturated heavy soils. I plant several hundred zinnias of various varieties every year. Some plants receive full sun, while others receive only about 4-5 hours of sunlight per day, but they all bloom beautifully.
How to Plant Zinnias
Zinnias continually amaze me with their willingness to sprout and grow, even when conditions haven’t been perfect.
Zinnias are commonly directly seeded right into the garden soil, but they can also be started indoors and transplanted with care. Zinnias don’t like to have their roots disturbed (like happens during transplanting), so starting them early and letting them get rootbound can cause issues.
To direct seed zinnias:
-
Prepare the bed, removing roots, stones, and weeds.
-
Work in a layer of compost.
-
Space seeds about 6-9 inches apart, depending on the size of the variety, and in rows about 12 inches apart. The seeds are tiny and hard to handle, so don’t worry if an extra falls here and there.
-
Lightly cover seeds with soil. Small seeds, like zinnias, don’t need to be more than a quarter inch deep, and a scant covering of soil is sufficient.
-
Gently water the seeds with a watering can or gentle pattern from a hose wand.
To start zinnias indoors and transplant:
-
Start 3-4 weeks before your last spring frost.
-
Fill cell packs or trays with pre-moistened seed starting mix. 72-cell trays work well.
-
Sow two seeds per cell.
-
Cover the seeds lightly with more seed starting mix or vermiculite.
-
Keep moist and warm, and they’ll germinate in a few days to a week.
-
Harden off zinnia seedlings and transplant outdoors after all danger of frost has passed.
Zinnia Growing Tips
Sunshine, rain, and moderately fertile soil are all zinnias that need to bloom, but following these few tips will increase their vigor and blooms.
Water and Fertilizer
Zinnias are tolerant of dry weather once they are well established. While they’ll grow fat and sassy with a bit of supplemental watering, they are resilient and usually are one of the last flowers to show drought stress in hot weather.
Compost worked into the bed before planting provides all that zinnias need, but you can supplement this with a dose of slow-release fertilizer side-dressed once they’ve reached about six inches in height. Any balanced NPK ratio product will work fine.
Zinnias growing in pots will need more frequent watering, possibly daily in hot weather, as the soil in containers dries out much faster than that in a garden bed. Fertilize container zinnias every week or two with a diluted general-purpose fertilizer, following the directions on the label. They aren’t picky, and any balanced water soluble product will work.
Pinching zinnias
Zinnias can be pinched to promote a bushier plant and longer flowering stems. But you don’t have to pinch them, and it will delay flowering by about a week. Pinch zinnias, if desired, once the first central bud starts to develop. Snip it off just above a lower leaf node.
Deadheading zinnias
Zinnias will keep pushing flowers as long as they are happy with the sun, moisture, and drainage. However, fading zinnia blooms should still be removed, both to encourage prolific blooming and to maintain aesthetic appeal. Old zinnia blooms, particularly in light colors, can look brown and unsightly. Reach deep into the plant and snip off the old bloom just above a leaf node.
Pests and Problems
Zinnias are pretty tough customers and are not often bothered too much by pests. While a grasshopper or aphid may stop for lunch, it seldom sets the plant back. Powdery mildew can be a problem with zinnias, especially when planted closely together, but usually, it won’t do more than create a faint white look to the foliage.
If your garden typically suffers from bad powdery mildew breakouts, strip off the leaves on the lower 6 inches of tall zinnia plants to increase air circulation.
Harvesting for Cut Flowers
Zinnias make excellent cut flowers, and it’s one of the best reasons to grow them. Their blooms are sturdy, can take a bit of jostling, and will last in the vase for a solid week. A bouquet of zinnias is cheerful and easy to arrange, making it perfect for gifting or enjoying yourself in every room of the house. If you plant a patch of zinnias, you’ll have plenty of blooms to share.
-
Harvest zinnias in the morning or evening when the flowers are fully hydrated.
-
Select zinnias that are almost fully or fully opened.
-
Reach down and cut long stems, snipping just above a leaf node. If you are cutting at least 18 inches down on a three-foot-tall zinnia, you’re getting the right idea. Ideally, leave a few nodes below the cut to produce new growth. Cutting deeply thins the plant, allowing for better airflow and encouraging longer future stems.
-
Strip off any foliage which will be in the water when the flowers are in the vase. Use the fingers of one hand to gently surround the stem and hold onto it with the other. Strip the leaves off in a single downward motion.
-
Place cut stems directly into a bucket of water until you arrange them in a vase.